Getting access to CLOUD TOGGLE is a simple, three-part process: receive an invitation, register your account, and accept the company access so you can manage virtual machines. This guide walks through each step with clear actions so you can be up and running in minutes.
Before you begin
Make sure an administrator has sent an invitation to the email address you will use. Without that invitation you will not be able to create an account that is associated with your organisation.
Step 1: Accept the invitation from your email
Open the invitation email and locate the acceptance link. Click that link to start the registration process. The email is the single point of entry that connects your user identity to the company workspace.
Step 2: Complete the registration form
After clicking the invitation link you will be taken to a registration form. Provide your name, choose a password, and fill any additional fields required by your organisation. Complete the captcha to prove you are human, then click Register.
Once registered you will be directed to the CLOUD TOGGLE portal where the final piece of onboarding awaits.
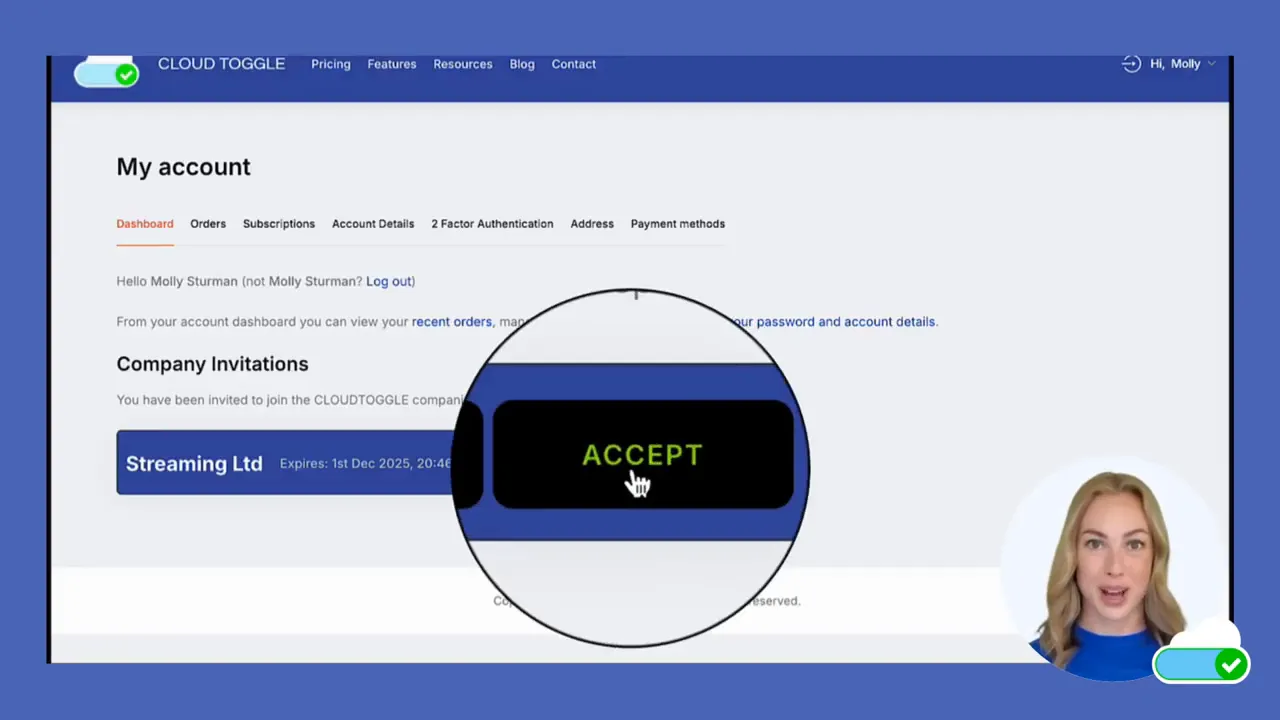
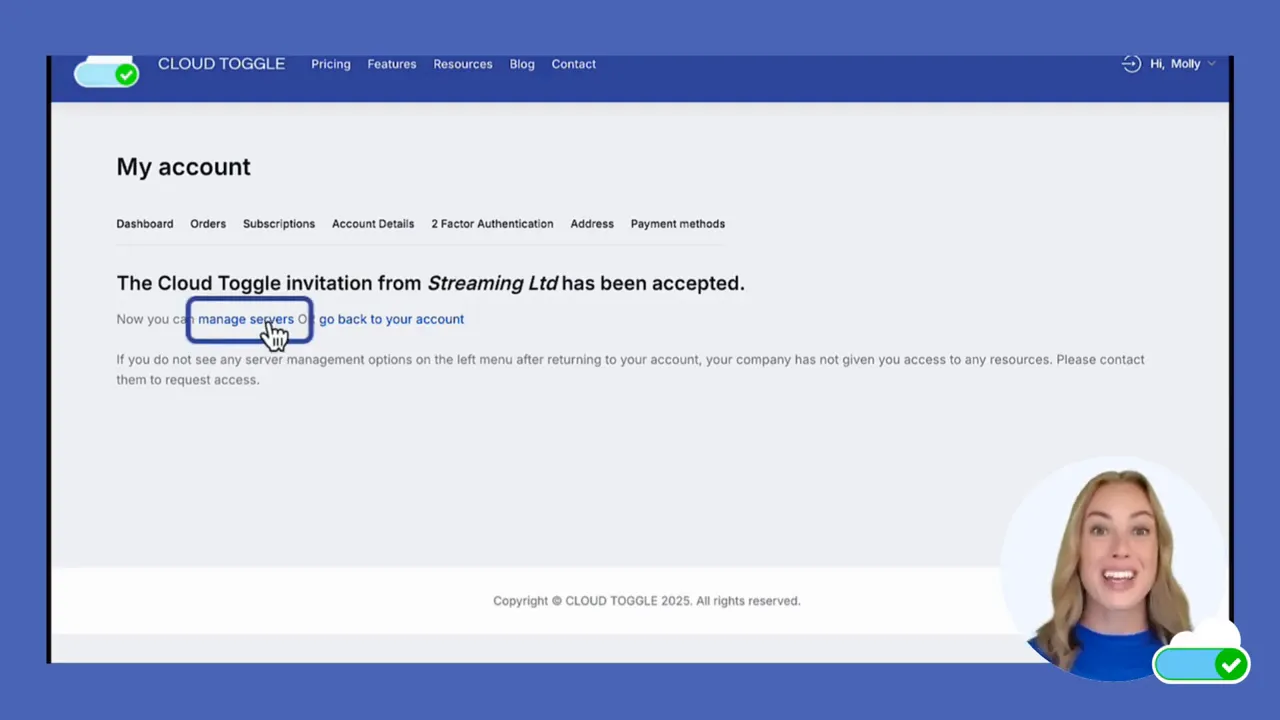
Step 3: Accept the company invitation
When the portal opens you will see a prompt to accept the company invitation. Confirming this links your new account with the organisation and makes the virtual machines you have permissions for visible in the portal.
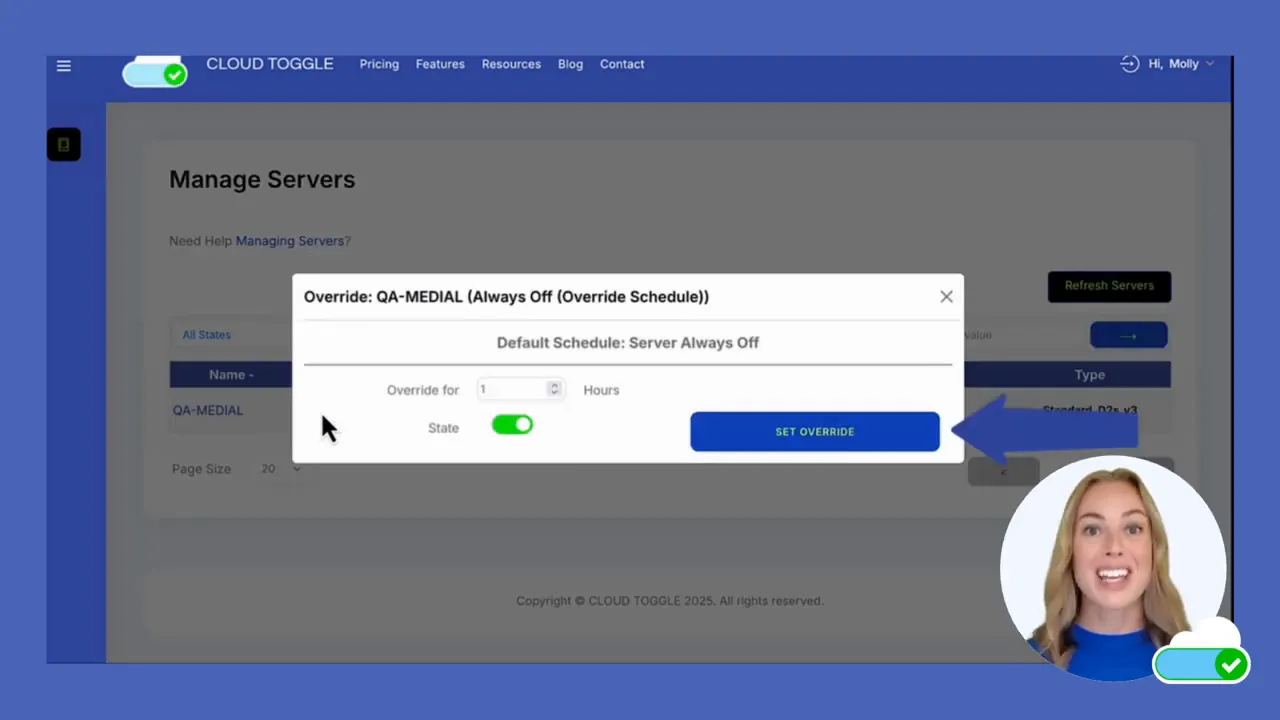
Managing servers and starting a VM
With access granted, click Manage Servers to view your assigned VMs. To power on a server follow these simple actions:
- Locate the server you need to use in the list of available VMs.
- Toggle the server to the on position.
- Enter the number of hours you want the VM to remain on.
- Click Set Override to apply the change.
The override feature is designed to give temporary control without changing long-term schedules. When the override period ends the server will follow the normal scheduling rules set by your organisation.
Tips for smooth access
- Check spam and promotions if you do not see the invitation in your inbox. Invitation emails can land outside the primary inbox.
- Use the same email address that the administrator sent the invitation to. Using a different address will prevent the link from connecting to the intended company account.
- Note the override duration so you do not inadvertently keep a VM running longer than necessary.
- Keep login details secure and enable any multi factor authentication options your organisation requires.
Troubleshooting common issues
If the invitation link does not open, try copying the link and pasting it into a new browser window. Use an up to date browser and disable extensions that might block redirects or content.
If you receive an error during registration, verify that all required fields are completed and that the captcha is solved correctly. If problems persist, ask your CLOUD TOGGLE administrator to resend the invitation.
Security and good practice
CLOUD TOGGLE is built so administrators can control access centrally while users get lightweight tools to manage VM time. Always follow company policies on VM usage and only set overrides when you need the machine active for specific tasks.
What should I do if I did not receive an invitation?
Contact your organisation’s CLOUD TOGGLE administrator and confirm the correct email address was used. Ask them to resend the invitation and check your spam or promotions folders in case the message was filtered.
Can I register with a different email after the invite was sent?
No. The invitation is tied to the email address specified by the administrator. Use that exact address to accept the invitation and register so your account links to the company.
How long can I set a VM to stay on with an override?
Enter the number of hours required when setting the override. The override will keep the VM on for that period and then the system will revert to the scheduled state. Be mindful of organisational policies on maximum override durations.
What if I cannot toggle the server on even after accepting the invitation?
You may not have the necessary permissions for that particular VM. Check with your administrator to confirm your role and access rights. If permission is confirmed, try logging out and back in or clearing your browser cache before attempting again.
Final notes
Accepting an invitation and logging into CLOUD TOGGLE is designed to be fast and reliable. With the invitation link, registration, and company acceptance complete you will have the tools to manage virtual machines responsibly. Use the override feature to control VM runtime without impacting long term schedules.
For additional resources and detailed documentation visit www.cloudtoggle.com
Want to Learn More? |
|
|
| Book a Meeting |