Let's be honest, the easiest way to slash your AWS costs is stunningly simple: stop paying for things you aren't using. It sounds obvious, but a huge chunk of cloud spend is just waste. We're talking about overprovisioned instances and idle infrastructure that quietly drain your budget, often accounting for 20-40% of a typical AWS bill. The real trick is gaining the visibility you need to reclaim that cash.
Your Starting Point for AWS Cost Reduction
That creeping AWS bill can feel like a force of nature, an unavoidable cost of doing business. But it's not. For most companies, the path to a healthier cloud budget starts with two basic, non-negotiable steps: auditing what you have and tagging it so someone is accountable. Without this foundation, you're just guessing. You can't optimize what you can't see.
This is the fundamental loop of any real cost-saving effort.
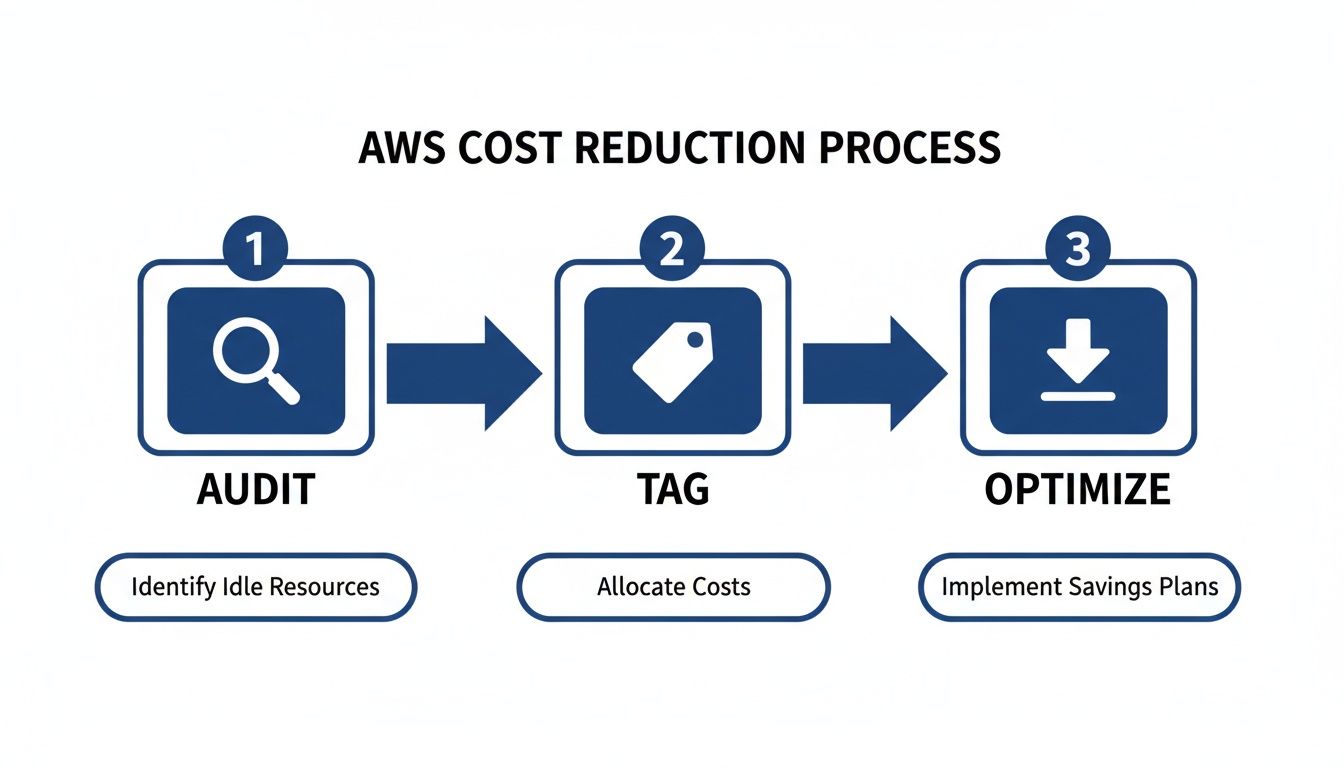
As the visual makes clear, you can't get to optimization without first running a solid audit and putting a consistent tagging strategy in place.
Conduct a Quick Cost Audit
First things first, you need to find your biggest money pits. You don't need fancy third-party tools for this initial pass; AWS Cost Explorer is more than powerful enough. Just jump in and start filtering your spending by service. It probably won't surprise you to find that Amazon EC2 and Amazon RDS are eating up most of your budget.
Once you’ve identified the culprits, dig into those specific services. Look for resources that have been running for weeks or months with laughably low CPU utilization. This is the clearest sign of overprovisioning.
A classic mistake is building out infrastructure for a peak capacity that might happen twice a year. A quick audit almost always uncovers instances humming along at less than 10% average CPU use. That’s pure, uncut waste.
The point of this first audit isn't to boil the ocean. You're just looking for the low-hanging fruit, the easy wins that deliver immediate savings and build the momentum you need for bigger optimization projects down the line.
Implement a Consistent Tagging Strategy
Okay, so now you know what is costing you money. The next question is why. This is where a rock-solid tagging strategy becomes your best friend. Tagging is just attaching simple metadata labels to your AWS resources, but its impact is massive. Without tags, your bill is just one big, scary number. With tags, you can attribute every single dollar of spend to a specific team, project, or environment.
You can start with a simple framework. At a bare minimum, every single resource should have tags for:
- Project: The application or initiative the resource is for.
- Team: The engineering or business team that owns it.
- Environment: Is this
production,staging,development, ortesting?
This simple structure creates instant accountability. When a dev team sees their monthly spend laid out in a report, they’re a lot more likely to shut down that test server they forgot about. Good tagging turns cost management from a finance problem into a shared responsibility, building the foundation for a truly cost-aware culture.
Mastering Compute Costs with Smart Instance Management
Let's be honest, compute is almost always the biggest line item on your AWS bill. If you're serious about reducing costs, this is where you need to focus your energy. It's not just about running audits; it's a two-pronged attack: first, matching your instances to what your workloads actually need (rightsizing), and second, picking the smartest way to pay for them.

Taming your compute spend comes down to being deliberate. Stop guessing what capacity you might need. Instead, use real data to make informed decisions that slash overspending without ever hurting performance.
Rightsizing Based on Real Workload Demands
Rightsizing is just what it sounds like: analyzing performance data to pick the most efficient instance type and size for each of your workloads. So many teams spin up instances based on a worst-case "peak demand" scenario, which means they're paying for horsepower that sits idle most of the time.
This habit of overprovisioning is incredibly common, and it creates a massive opportunity for savings. I've seen organizations cut their cloud bills by 20-40% through rightsizing alone, all without affecting their applications or user experience one bit. It's all about matching instances to reality, not to inflated guesses.
Your best friends here are tools like AWS Compute Optimizer and Amazon CloudWatch. They dig into your historical usage (CPU, memory, network I/O) and tell you what's really going on. A dead giveaway? An instance that consistently hums along below 40% CPU utilization. That's a prime candidate for downsizing.
Rightsizing isn't just about going smaller. It's also a chance to modernize. You might find that an old
m4.largeinstance can be swapped for a newer, cheaper, and more powerfulm6i.largeor even a Graviton-basedm7g.large. You get better performance for less money. It's a win-win.
Building a Blended Purchasing Strategy
Once you've got your instances sized correctly, the next move is to stop paying full price. On-Demand is great for flexibility, but it's the most expensive way to run compute. A smart purchasing strategy mixes and matches AWS's different pricing models to get the best deal for every kind of workload.
Savings Plans: These are your go-to for predictable, baseline usage. You commit to a certain hourly spend for one or three years, and in return, you get a discount of up to 72%. They're super flexible and automatically apply across different instance families and even regions.
Reserved Instances (RIs): RIs offer similar deep discounts but lock you into a specific instance family in a specific region. They're perfect for workloads that are rock-solid and stable, like a production database where you know the instance type isn't going to change.
Spot Instances: This is where the massive savings are. Spot Instances are basically AWS's spare compute capacity, offered at discounts up to 90%. The catch? AWS can take them back with just a two-minute warning. This makes them a perfect fit for any workload that can handle interruptions, think batch processing, data analysis, or your CI/CD pipeline. We have a detailed guide on how to use EC2 Spot Instances effectively if you want to dive deeper.
A powerful strategy I've used with many clients is to cover the absolute bare-minimum, always-on workload with three-year Savings Plans to lock in the deepest discount. Then, layer on one-year Savings Plans or RIs for the more variable but still predictable workloads. Finally, use Spot Instances for everything else that's fault-tolerant. This blended approach ensures you're never paying a penny more than you have to.
Shutting Down Idle Resources: The Low-Hanging Fruit of Cloud Savings
Paying for cloud resources you aren't using is one of the easiest ways to burn through your budget. It's also one of the easiest problems to fix. This is especially true in non-production environments like development, staging, and QA, where servers often sit completely idle outside of a standard 9-to-5 workday.
This is where automation becomes your best friend.
Here's a simple but powerful fact: just by shutting down your non-production EC2 instances during nights and weekends, you can slash their compute costs by up to 70%. The secret is to stop relying on manual reminders and switch to a "set it and forget it" automated system.
Native Schedulers vs. Third-Party Platforms
AWS gives you the tools to build this automation yourself, primarily with the AWS Instance Scheduler. It’s a powerful, template-based solution you deploy directly into your account. While it gives you a ton of control, it also comes with a pretty hefty operational price tag.
Let's be real: setting up the AWS Instance Scheduler is an engineering project. You need to be comfortable with CloudFormation, IAM roles, DynamoDB tables, and troubleshooting the whole thing when it breaks. For many small and mid-sized teams, this complexity is a non-starter. A simple cost-saving idea quickly snowballs into a time-consuming infrastructure task.
This is where third-party platforms like CLOUD TOGGLE come in. They are built specifically to make this process painless. Instead of wrestling with AWS services, you get a clean, user-friendly interface where you just point, click, and set a schedule. This simple approach means anyone on your team, not just the senior engineers, can help cut down the AWS bill.
The real win with a dedicated scheduling platform isn't just turning servers off and on. It's about making cost optimization accessible and secure for everyone, from developers to project managers, without having to give them the keys to your entire AWS account.
Comparing Key Automation Features
When you're weighing a native tool against a dedicated platform, you need to look beyond the basic scheduling function. The right choice really comes down to your team's size, technical skills, and security posture.
Comparing AWS Native Schedulers vs CLOUD TOGGLE
This table breaks down the key differences between using AWS's built-in tools and a specialized platform like CLOUD TOGGLE, helping you see which approach aligns better with your team's needs.
| Feature | AWS Instance Scheduler | CLOUD TOGGLE |
|---|---|---|
| Setup Complexity | High, requires deep AWS knowledge (CloudFormation, IAM). | Low, intuitive web interface, setup in minutes. |
| User Interface | None, relies on resource tags and AWS console configurations. | Visual, calendar-based scheduling for easy management. |
| Security | Requires granting broad IAM permissions within your account. | Granular, role-based access without exposing cloud credentials. |
| Multi-Cloud Support | AWS only, requiring separate solutions for other providers. | Centralized management for both AWS and Azure. |
| Ease of Use | Challenging for non-technical users. | Designed for everyone, including non-technical staff. |
The takeaway here is pretty clear. The native AWS solution offers deep customization, but you pay for it with complexity and a steep learning curve. Platforms like CLOUD TOGGLE focus on simplicity, security, and accessibility, making automated scheduling a practical option for any organization, not just those with dedicated DevOps teams.
Putting Your Scheduling Strategy Into Action
Ready to get started? It's easier than you think.
First, identify all your non-production instances. Look for tags like env:dev, env:staging, or env:qa. These are your prime candidates for scheduling.
Next, set up a default "off-hours" schedule. A great starting point is powering down instances from 7 PM to 7 AM on weekdays and keeping them off all weekend. This one change can produce immediate and predictable savings every single month. For an even more hands-off approach, you could explore a serverless architecture, which is designed from the ground up to eliminate the concept of idle resource costs.
Finally, and this is crucial, give your team a simple way to override the schedule. A developer pulling a late night needs a way to turn their machine back on without navigating the AWS console or filing a support ticket. Platforms like CLOUD TOGGLE are perfect for this, providing a simple "on" button. You can dig deeper into the hidden cost of idle VMs to see how much this adds up.
If your system is too rigid, people will just find workarounds, and your whole automation effort will fall flat. Flexibility is key to getting everyone on board.
Taming Your Storage and Data Transfer Costs
Compute costs usually get all the attention, but storage and data transfer fees can sneak up on you and inflate your AWS bill. These expenses often fly under the radar until you get that end-of-month surprise. But with a few smart moves, you can get them under control.
It really boils down to this: stop paying premium prices for data you rarely touch and cut out unnecessary data movement. Think of it like a physical warehouse. You wouldn't store old inventory in your most expensive, front-of-house space. The same logic applies here. Aligning your data to the right storage tier based on how often you access it is the key to cutting costs.
Master S3 Storage Tiers with Lifecycle Policies
Amazon S3 is a beast, but just dumping everything into the S3 Standard storage class is a classic rookie mistake and an expensive one. AWS gives you a whole menu of storage tiers, each with its own price and performance. The real magic happens when you automate moving data between them using S3 Lifecycle policies.
A lifecycle policy is just a set of rules that tells S3 what to do with your files as they get older. For example, you could set a rule to automatically shift log files from S3 Standard to S3 Infrequent Access (S3-IA) after 30 days. Boom. That one move can save you over 40% on storage costs for that data.
Take it a step further. Add another rule to move that same data to Amazon S3 Glacier Flexible Retrieval after 90 days for long-term archiving, and your savings will plummet even more.
- S3 Standard: For your hot, frequently accessed data that needs to be ready in milliseconds.
- S3 Infrequent Access (S3-IA): Great for data you don't access much but still need quickly when you do.
- S3 Glacier Instant Retrieval: For archive data that you need back right now.
- S3 Glacier Flexible Retrieval: The workhorse for long-term archives where retrieval can take a few minutes or hours.
- S3 Glacier Deep Archive: The absolute cheapest option for data you almost never expect to touch again.
Setting up these policies is a "set it and forget it" task that delivers continuous, passive savings. If you want to go deeper, you can learn more about managing your Amazon S3 storage costs and get more tactical tips.
Clean Up Orphaned EBS Volumes and Snapshots
Another huge source of waste? Elastic Block Store (EBS) volumes and snapshots that are just floating around, not attached to any EC2 instance. When you terminate an instance, AWS deletes the main root volume by default, but any other volumes you attached just stick around, quietly racking up charges month after month.
The same goes for EBS snapshots. They’re essential for backups, but they can pile up fast. A single old snapshot is cheap, but hundreds or thousands of them create a death-by-a-thousand-cuts scenario for your budget.
A regular audit is your best defense against this kind of cost creep. Hop into the AWS Management Console or run a quick script with the AWS CLI. Look for EBS volumes in an "available" state (that means they're unattached) and snapshots older than your retention policy. Then, get rid of them.
Slash Expensive Data Transfer Fees
Data transfer fees are often the most confusing and shocking part of an AWS bill. Moving data into AWS is mostly free, but moving it back out to the internet costs money. And those costs can add up fast, especially if you're serving a lot of content to users all over the world.
To really get a handle on this, it's worth evaluating your cloud storage options against on-premise solutions to understand the different cost models. For data that's staying in AWS, here are the two biggest ways to cut down those "data transfer out" charges.
Use Amazon CloudFront: CloudFront is Amazon's content delivery network (CDN). It's a game-changer. It caches your content at "edge locations" all over the globe, so it's physically closer to your users. When someone requests your content, it’s served from the nearest location. This drastically reduces the distance the data travels, and in turn, the cost.
Leverage VPC Endpoints: When your services inside AWS talk to each other, like an EC2 instance pulling from an S3 bucket, that traffic can sometimes get routed over the public internet, which means you pay for it. By setting up VPC Endpoints, you create a private, direct connection between your VPC and other AWS services. This keeps all traffic on the AWS network, which means no data transfer fees.
Thankfully, AWS has a history of making things cheaper. They've cut prices 129 times since launching. For instance, the S3 Express One Zone tier recently saw its storage price slashed by 31% and data transfer charges cut by 60%, showing they're serious about passing savings on.
Technical fixes like rightsizing instances or automating shutdowns are great for quick wins, but they're really just treating the symptoms of overspending. If you want true, sustainable cost optimization in AWS, you have to look deeper. The real challenge isn't technical, it's cultural. It’s about changing how your entire organization thinks about the cloud.

This is where the concept of FinOps comes into play. Think of it as an operating model that brings financial accountability to the flexible, variable spending model of the cloud. It’s all about giving teams the visibility, data, and shared goals they need to make smarter, cost-conscious decisions without killing innovation.
Foster Cross-Functional Collaboration
Let's be honest: the old model of siloed teams just breaks in the cloud. You’ve got finance teams who don’t see what’s being spent until a massive bill lands a month later, and engineering teams who often have zero clue what their architectural choices actually cost. This disconnect is a massive driver of cloud waste.
FinOps is the bridge across that gap. It creates a shared language and common goals, getting finance, ops, and development teams talking to each other about cloud spend.
The core idea is simple but powerful: shared accountability. When your engineers understand the cost impact of their code and finance understands the business value that spend is creating, you get a powerful feedback loop that drives efficiency almost by itself.
Suddenly, cost optimization stops being a dreaded, periodic cleanup project and becomes a part of the daily workflow. It gets baked right into the development lifecycle, not bolted on as an afterthought.
Empower Engineers with Visibility and Tools
You can't expect your engineers to care about costs if they're flying blind. The very first step in building a FinOps culture is giving developers clear, easy-to-digest data about the resources they own. This means getting away from monolithic, consolidated bills and moving toward granular, team-specific reporting.
This is where your tagging strategy and tools like AWS Cost Explorer become absolutely essential. When a team can pull up a dashboard and see their specific spend, broken down by project or feature, the costs become real. They become tangible.
Of course, visibility isn't enough; you also have to give them the tools to act on that information. Setting up proactive alerts with AWS Budgets is a simple but incredibly effective way to prevent surprises. You can configure an alert to ping a team's Slack channel when their projected monthly spend is on track to blow past the budget. This gives them a heads-up to investigate and course-correct before it becomes a real problem.
Establish Clear Governance and Policies
While empowering teams is crucial, you still need some guardrails. Strong governance provides the framework for teams to operate freely but responsibly. This isn't about creating restrictive bureaucracy; it's about setting clear, common-sense rules of the road.
Effective governance policies could include things like:
- Mandatory Tagging: Every single resource must be tagged with an owner and a project right at creation. Any untagged resources get automatically flagged for immediate review.
- Budgetary Guardrails: Set hard budgets for non-production environments and use automated actions to enforce them, like shutting down resources that push a dev environment over its limit.
- Regular Cost Reviews: Hold monthly or bi-weekly meetings where teams review their spending, talk through any anomalies, and share their optimization wins.
These policies create a system of checks and balances that reinforces a culture of cost awareness. The whole point is to make the "right" way of doing things the easiest way.
Ultimately, adopting a FinOps mindset is about tying your cloud spending directly to business value. Industry data shows that AWS can deliver savings from 51% to 76% compared to on-prem, but you don't get there by accident. It takes active management. As a real-world example, NASA's Jet Propulsion Lab saved nearly $1 million annually by moving to AWS, a success story built on diligent infrastructure management. You can dig into more of these stats on Hotframeworks. By embedding cost awareness into your company’s DNA, you ensure your cloud investment becomes an engine for growth, not just a drain on the bottom line.
Common Questions About Reducing AWS Costs
Diving into AWS cost optimization always brings up a ton of questions. As you start the journey from a basic audit to building a real FinOps culture, you're going to hit roadblocks and wonder which way to turn. This section cuts through the noise and gives you direct, practical answers to the questions we hear most often.
The goal here is to give you the confidence to make the right calls, whether you're trying to set a realistic savings target or figuring out how to get your engineering team to care about the cloud bill.
What Kind of Savings Can We Realistically Expect?
This is usually the first thing leadership wants to know, and while "it depends," the potential is almost always massive. For most companies just starting out, aiming to cut the overall AWS bill by 15% to 30% is a perfectly realistic goal. That number comes from just tackling the most obvious sources of waste.
These early savings are usually a mix of quick fixes and more foundational shifts:
- Shutting Down Idle Resources: Scheduling non-production instances to power off at night and on weekends can slash their individual costs by up to 70%. It’s a huge win.
- Rightsizing Instances: Finding and shrinking over-provisioned EC2 and RDS instances typically trims 10-20% off your compute spend right away.
- Cleaning Up Storage: Deleting orphaned EBS volumes and ancient snapshots gives you an immediate, if smaller, savings bump that really adds up over time.
- Smarter Purchasing: Moving stable workloads from expensive On-Demand pricing to Savings Plans or Reserved Instances unlocks discounts between 40-72%.
Once you’ve got those basics locked down, you can start chasing even bigger numbers. Mature teams often push savings past 40% by getting creative with things like Spot Instances for workloads that can handle interruptions.
How Much Time Does AWS Cost Optimization Take?
The time you’ll need to invest really depends on how complex your setup is and what tools you have at your disposal. Your first steps, like just identifying your top five most expensive or underused resources, might only take a couple of hours. A quick-and-dirty audit in AWS Cost Explorer to find the low-hanging fruit can easily be done in an afternoon.
But let's be clear: building a sustainable cost optimization practice is an ongoing commitment, not a one-and-done project.
Think of it less like a sprint and more like starting a new fitness routine. It takes a lot of effort to get going, but once it becomes a habit that's baked into your weekly operations, the time commitment drops way down.
For instance, rolling out a comprehensive tagging policy might take a few days of planning and work. On the other hand, using an automated scheduler like CLOUD TOGGLE to handle idle resources can be set up in less than an hour and starts saving you money on day one with zero ongoing effort. The trick is to go after the actions with the highest return for the least amount of your time first.
How Do We Get Engineering Teams on Board?
Getting engineers to make cost optimization a priority can feel like an uphill battle. Their main job is to build features and keep things running, not pinch pennies. The secret is to frame cost savings not as a budget cut, but as an interesting engineering problem to solve, one that makes the whole business healthier.
First, give them visibility. Engineers can't optimize what they can't see. Use your tagging strategy to build dashboards in AWS Cost Explorer that show each team exactly what they're spending. When a team sees costs tied directly to their project, they start to take ownership.
Next, make it easy for them to do the right thing. Don't just point out a problem; give them the tools to fix it. This could be as simple as giving them access to AWS Compute Optimizer for rightsizing ideas or a platform where they can easily schedule their own dev environments.
Finally, celebrate the wins. When a team successfully rightsizes a big service or rolls out a new storage policy that saves thousands, make a big deal out of it. That positive reinforcement is what turns cost awareness from a chore into a core part of the engineering culture.
Should We Focus on Usage or Rate Optimization First?
Ah, the classic chicken-and-egg problem. Do you clean up your usage by rightsizing everything before you commit to a discounted pricing plan? Or do you lock in lower rates right now to stop the bleeding? The best answer is: do both, at the same time.
If you wait to perfect your usage before buying Savings Plans, you're literally throwing money away every single day on full-price instances. But if you buy commitments for bloated, oversized instances, you're just locking in your bad habits at a discount.
A much smarter approach is to tackle them in parallel.
- Grab the Quick Usage Wins: Immediately find and shut down resources that are obviously idle or completely unused.
- Cover Your Baseline: Figure out your stable, predictable workload and cover that with Savings Plans to start saving money today. Because Savings Plans are flexible, the discount will still apply even if you rightsize the instances later.
- Rightsize Constantly: Make rightsizing a continuous habit. Review your top-spending services every single month.
- Adjust Your Commitments: As your environment gets more efficient, you can adjust your commitment portfolio the next time you renew.
This parallel track ensures you're always capturing savings from both sides of the coin, pushing your financial efficiency to the max.
Ready to stop paying for idle cloud resources? CLOUD TOGGLE makes it incredibly simple to automate VM shutdowns in AWS and Azure, slashing non-production costs by up to 70%. Get started with a 30-day free trial and see how much you can save.