Effective cost optimization in AWS isn't a one-time project; it's a continuous loop of refining your cloud spending to make sure every dollar delivers real business value. It’s all about analyzing your bill, hunting down waste, right-sizing your resources, and smartly using pricing models to lower costs without hurting performance.
Understanding Your AWS Bill and Where to Start
Let's be honest, the first time you look at an AWS bill, it can feel like trying to read a foreign language. It's complex and often unpredictable. But the good news is that a huge chunk of that spend is completely within your control.
The first step to getting a handle on your costs is gaining crystal-clear visibility. You can't optimize what you can't see. Diving deep into your spending patterns is the non-negotiable starting point for any successful cost-saving strategy. This isn't just about tracking numbers; it's about creating a detailed map of your infrastructure that ties every single dollar back to a specific project, team, or environment.
The Dominance of Compute Spending
For most businesses, the cost optimization journey starts with compute. Services like Amazon EC2, Lambda, and Fargate are the engines of your cloud operations, and they almost always make up the biggest slice of the monthly bill. If you want to make a real dent in your spending, this is where you should focus first.
The whole field of cloud financial management (FinOps) has evolved to reflect this reality. We've seen a clear shift from simple, one-off cleanups to more structured programs, with compute consistently being the main lever for savings. In 2024, it's common for compute services to account for 40% or more of a company's net AWS spend, even after discounts.
Even with this focus, there's still a ton of waste. For mid-market companies spending between $500,000 and $10 million a year, the median Effective Savings Rate (ESR) for compute hit 23% in 2024. This tells us two things: organizations are definitely capturing some savings, but a massive amount of money is still being left on the table. It’s a clear sign that just buying a few Savings Plans isn’t a complete strategy. You can discover more insights about these compute cost trends on ProsperOps.com.
Gaining Initial Visibility
You don't need fancy, expensive third-party tools to get started. AWS gives you powerful native services designed to make your spending easier to understand.
- AWS Cost Explorer: Think of this as your main dashboard for visualizing your cost and usage data. You can use it to filter your spending by service, linked account, or region to quickly pinpoint your biggest cost drivers.
- AWS Cost and Usage Reports (CUR): When you need to get really granular, the CUR provides the most detailed billing data you can get. It's the raw data you need for deep-dive analysis or building out custom dashboards. You can learn more about how to master the details within AWS Cost and Usage Reports in our guide.
The process for getting control of your AWS costs is a simple, repeatable cycle.
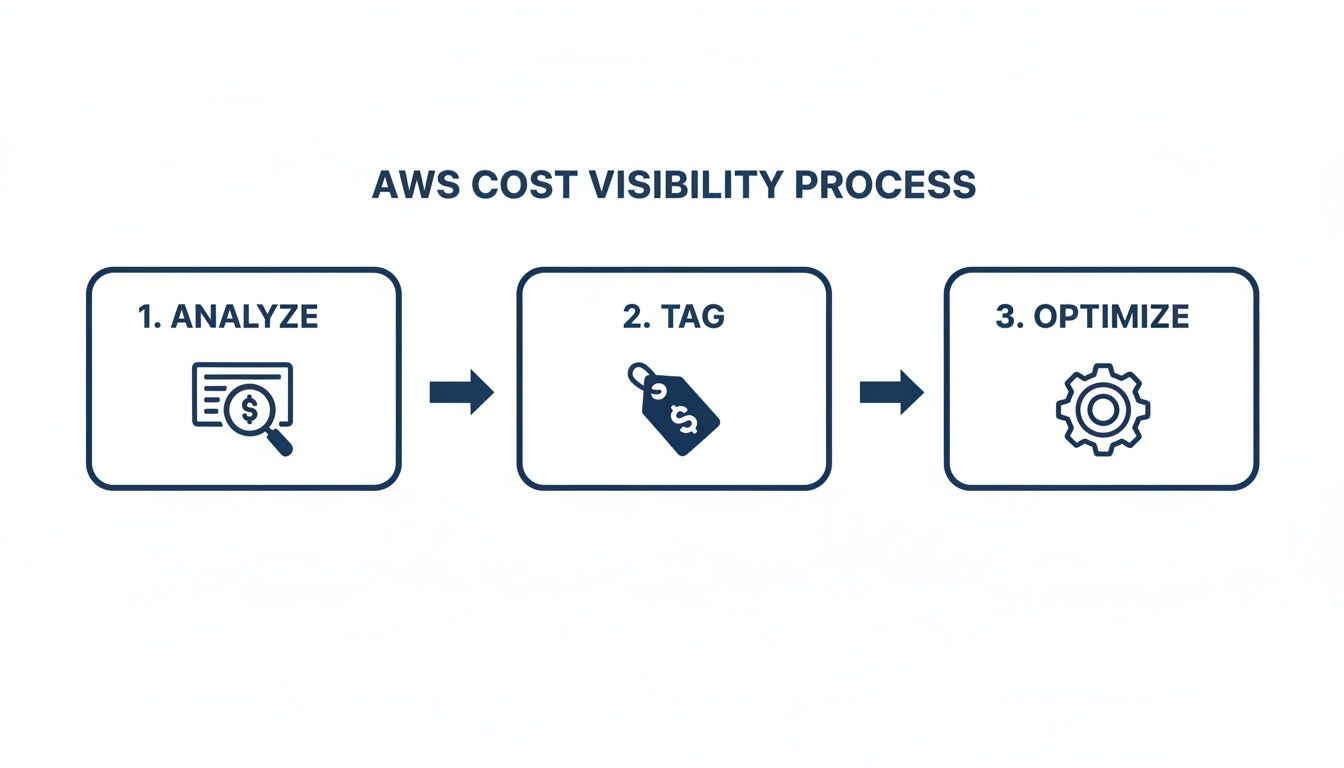
This loop is straightforward: analyze your spending, tag everything so you know who owns what, and then act on what you've learned to optimize.
Key Takeaway: True cost visibility isn’t a one-and-done task; it’s an ongoing discipline. When you make analysis and tagging a core part of your daily operations, you build the foundation for every other cost-saving action you'll take.
Getting a solid tagging strategy in place is absolutely non-negotiable. Tags are just metadata labels you assign to your AWS resources, but they're incredibly powerful. They let you categorize your costs by project, team, application, or anything else that makes sense for your business. Without consistent tagging, figuring out who spent what becomes a painful, time-consuming guessing game.
Finding and Eliminating Hidden Cloud Waste
The fastest way to slash your AWS bill is to stop paying for things you aren't using. It sounds simple, but hidden cloud waste often called "zombie" resources silently bloats your monthly costs.
Imagine idle EC2 instances, unattached EBS volumes, and oversized RDS databases all churning away 24/7. They’re consuming budget without delivering a shred of value. This isn’t a small leak; for many companies, it’s a significant financial drain.
Tackling this waste head-on delivers immediate savings and builds a much-needed foundation for better resource hygiene. The goal is to make finding and eliminating these assets a core part of your daily operations, not just a cleanup project you get to once a quarter.

Uncovering Waste with Native AWS Tools
You can start hunting for these zombie resources right now, using tools already in your AWS account. These services are built to give you automated, actionable recommendations that lead to quick financial wins.
Two of the most powerful are AWS Trusted Advisor and the AWS Cost Optimization Hub. Think of them as automated auditors for your entire environment.
- AWS Trusted Advisor: This service scans your infrastructure and gives you real-time guidance across several categories, including cost optimization. It flags things like low-utilization EC2 instances, idle load balancers, and unattached EBS volumes, handing you a clear to-do list for cleanup.
- AWS Cost Optimization Hub: This tool pulls recommendations from various AWS services into one central dashboard. It even prioritizes suggestions based on potential savings, making it easy to focus on the highest-impact actions first. It sources data from services like AWS Compute Optimizer to provide very specific rightsizing advice.
By checking these dashboards regularly, you can shift from reactive cleanups to a proactive process. Just set a recurring calendar reminder to review the recommendations weekly and assign clear ownership for acting on them.
Introducing the Cost Efficiency Metric
Tracking progress is absolutely critical for keeping up the momentum in your cost optimization aws efforts. To help with this, AWS rolled out a unified metric called Cost Efficiency within the Cost Optimization Hub. It's designed to quantify the business impact of wasted resources and show you how much of your spend is still optimizable.
The metric calculates your efficiency as a percentage, looking back at a 90-day history of rightsizing, idle resource, and commitment recommendations. For many organizations, this feature reveals that 10% to 30% of their monthly AWS spend is immediately optimizable a huge chunk of which comes from idle compute. We're talking about dev/test environments left running overnight or oversized machines humming along with single-digit CPU utilization.
If you want to dive deeper into this shift toward accountability, you can read the full analysis of FinOps updates from AWS re:Invent on FinOps.org.
This shift reframes the conversation from simple "cost reporting" to "engineering profitability." Success is no longer just about uptime; it's about how close you can keep your Cost Efficiency score to 100% through disciplined, automated practices.
Creating a Decommissioning Process
Finding waste is only half the battle. You also need a structured process for getting rid of it safely. A haphazard approach is a recipe for accidentally deleting something important. A formal decommissioning process ensures you can remove waste without causing chaos.
Here’s a simple but effective workflow you can adopt:
- Identify and Tag: When you find a potentially idle resource, tag it. Use something like a "decommission-candidate" label and add a scheduled termination date, maybe 14 or 30 days out.
- Notify Owners: Use the resource's ownership tags to automatically notify the right team or person. This gives them a clear window to speak up if the resource is still needed.
- Automate Termination: If no one claims the resource by the scheduled date, an automated script (like an AWS Lambda function) terminates it. This removes the manual work and ensures consistent follow-through.
This kind of structured process creates a safety net, empowering your team to be aggressive in their cleanup efforts while minimizing risk. It transforms resource hygiene from a manual chore into a reliable, automated system that continuously improves your cost efficiency.
Rightsizing Your Resources for Maximum Efficiency
Overprovisioning is probably the single most common and expensive habit in the cloud. It’s that “just in case” thinking that leads us to launch resources much larger than we actually need, usually driven by a fear of performance problems down the road. This cautious approach leads directly to a bloated AWS bill, making rightsizing an absolutely essential part of any real cost optimization aws strategy.
Rightsizing is simple in concept: match your resources to what your workload actually needs. It's about paying for the performance you use, not the capacity you think you might need someday. By digging into real usage data, you can confidently downsize oversized instances and databases without breaking a sweat over application stability.

Analyzing Performance Metrics to Find Opportunities
Your journey into rightsizing begins with data. You can't just guess. Fortunately, AWS gives you the tools to gather performance metrics and make decisions based on facts, not feelings. The key is to look at patterns over time, not just a single snapshot.
Amazon CloudWatch is your source of truth here. It pulls together monitoring and operational data from your logs, metrics, and events. For rightsizing EC2 instances, you'll want to keep a close eye on a few key metrics:
- CPUUtilization: This is the classic indicator for oversized compute. If you see an instance consistently humming along with CPU utilization below 40% over a two-week period, it's a prime candidate for downsizing.
- MemoryUtilization: This isn't a default EC2 metric, but you can easily get it by installing the CloudWatch agent on your instances. High memory usage paired with low CPU might mean you need to switch to a memory-optimized instance family instead of just resizing.
- Network In/Out: These metrics help you see traffic patterns. An instance with tons of network traffic but low CPU might be better off on a networking-focused instance type.
By analyzing these metrics, you replace assumptions with hard data. This is how you confidently choose the perfect resource size for each workload.
Choosing the Right Instance Family
Rightsizing isn't just about going from a t3.large to a t3.medium. It's also about picking the right instance family for the job. AWS has a whole menu of instance families, each designed for specific types of work.
Using the wrong family means you’re paying for features you don't use. Running a memory-hungry application on a compute-optimized instance is just throwing money away.
Expert Tip: Make it a habit to review your workloads against the latest AWS instance families. AWS is always releasing new generations, like the move from M5 to M6 instances, that often deliver better performance for a lower price. It's one of the easiest wins you can get.
Here’s a quick breakdown of the usual suspects for EC2:
- General Purpose (T and M series): These are your workhorses, offering a good balance of compute, memory, and networking. They're a solid starting point for web servers, small databases, and a wide range of other apps.
- Compute Optimized (C series): Got a compute-bound application? These instances are for you. They have high-performance processors perfect for things like batch processing or media transcoding.
- Memory Optimized (R and X series): If your workload processes massive datasets in memory, these are what you need. Think high-performance databases or big data analytics engines.
Going beyond individual resources, a truly efficient setup involves applying actionable strategies for increasing operational efficiency across your entire cloud workflow.
Optimizing Your Storage Tiers
Compute isn't the only place to find rightsizing savings. Storage costs can creep up on you, especially for data that's just sitting there. AWS S3 has different storage tiers designed to give you cheaper options based on how often you access your data.
Too many teams just dump everything into S3 Standard, the most expensive tier. By setting up a simple data lifecycle policy, you can automatically shuffle data to cheaper tiers as it gets older. For example, any data that hasn't been touched in 30 days could move to S3 Standard-IA (Infrequent Access). For long-term archives, you can send it to Amazon S3 Glacier or Glacier Deep Archive and pay pennies on the dollar.
Automating Savings with Resource Scheduling
One of the quickest wins in cloud cost optimization is simply turning things off when nobody's using them. It sounds obvious, but it's a massive source of waste, especially in non-production environments like development, testing, and staging that often sit idle for most of the week. Automating a basic start-and-stop schedule is a powerful move that can slash costs without getting in anyone's way.
Think about a standard work week. If your development team works 9 AM to 5 PM, Monday to Friday, that's 40 hours of active use. But if you leave their EC2 instances and RDS databases running 24/7, you're paying for 168 hours of uptime. That leaves 128 hours of pure waste every single week, all the evenings, weekends, and holidays.
Just by powering down these resources during off-hours, you can wipe out a huge chunk of their cost. It's a straightforward but incredibly effective tactic.
Implementing a Scheduling Policy
Putting a scheduling policy into practice isn't just about flicking a switch; it requires a smart workflow. To make this work smoothly, you need a clear process. The principles behind creating effective workflows in other business areas apply here, too. It’s all about consistency and clear rules.
A solid scheduling workflow should have a few key pieces:
- Define Standard Schedules: Create a handful of baseline schedules for different teams or environments. A "dev schedule" might run 8 AM to 6 PM on weekdays, while a "QA schedule" could run longer to cover late testing cycles.
- Apply Schedules with Tags: This is where your tagging strategy pays off. A resource tagged with
environment:devshould automatically inherit the development schedule. This makes scaling your policy practically effortless. - Create an Override Mechanism: Let's be realistic, late nights and emergencies happen. You need a simple, secure way for authorized users to temporarily override a schedule without needing full admin access to the AWS console.
This kind of structured approach makes your automation effective but also flexible enough for the real world.
Choosing the Right Scheduling Tool
When it's time to actually implement this, you have a couple of paths you can take: stick with native AWS tools or go with a third-party platform built for simplicity.
The AWS Instance Scheduler is a solution you can deploy directly into your account. It's powerful and you can customize it to your heart's content, but it's not a simple setup. You'll be deploying a CloudFormation template and configuring DynamoDB tables, which can be a real headache for teams without deep cloud expertise.
On the other hand, specialized tools like CLOUD TOGGLE are designed to make this exact process dead simple. They offer intuitive interfaces that let you set up complex schedules in just a few minutes. More importantly, they provide critical features like role-based access control, so you can empower team leads to manage their own schedules without handing over the keys to your entire AWS account. To see how easy this can be, check out our guide on how to schedule AWS instance start and stop times.
Scheduling Tool Comparison for AWS Automation
Evaluating key features for scheduling automation to help you choose the right tool for your team's needs.
| Feature | CLOUD TOGGLE | AWS Instance Scheduler |
|---|---|---|
| Setup Time | Minutes (SaaS, point-and-click) | Hours to Days (Requires CloudFormation, DynamoDB, Lambda setup) |
| User Interface | Intuitive, web-based dashboard | None (Managed via tags, DynamoDB, and AWS Console) |
| Ease of Use | Designed for both technical and non-technical users | Requires deep AWS knowledge and technical expertise |
| On-Demand Overrides | Simple "toggle" buttons for authorized users | Complex; requires manual tag changes or console access |
| Role-Based Access (RBAC) | Built-in granular permissions for teams and users | Requires custom IAM policy configuration, which can be complex |
| Maintenance | Zero (Managed by vendor) | Self-managed (You are responsible for updates, errors, and maintenance) |
| Multi-Cloud Support | Yes (e.g., AWS, Azure) | No (AWS only) |
| Cost | Low monthly subscription fee | Free, but you pay for the underlying AWS resources (Lambda, DynamoDB, etc.) |
While both tools can get the job done, the right choice depends on your team's priorities. If you value speed, simplicity, and empowering non-technical users, a third-party tool is almost always the better bet.
Key Insight: Modern cost optimization benchmarks consistently show that basic automation, such as powering off non production EC2 and RDS instances outside of core business hours, can eliminate 40% to 65% of their uptime costs. This is because evenings, weekends, and holidays often represent 60% to 70% of the calendar week. When layered with discounts from Savings Plans, blended compute savings of 30% to 50% are increasingly common for mid market organizations.
Ultimately, the best tool is the one your team will actually use. While native solutions offer deep integration, the simplicity and security of specialized platforms often lead to faster adoption and more consistent savings. This one automated routine can quickly become one of your most effective cost-saving tools.
Using Savings Plans and Reserved Instances Strategically
Once you've trimmed the fat by eliminating waste, rightsizing resources, and setting up smart schedules, your AWS usage starts to look a lot more predictable. That stability is your green light to lock in some serious discounts using commitment-based pricing. This is a huge step in maturing your cloud financial management, moving from just reacting to your monthly bill to strategically planning your spend.
The whole idea is to commit to a certain level of usage over a one or three-year term. In exchange, AWS gives you a significant price break compared to On-Demand rates. The two main tools for this are AWS Savings Plans and Reserved Instances (RIs). While both can save you a ton of money, they play different roles in your strategy.

Differentiating Savings Plans and Reserved Instances
Getting the difference between these two is absolutely critical. They aren't interchangeable, and picking the right one for the right job can make a world of difference for both your budget and your team's flexibility.
AWS Savings Plans are the flexible, modern choice. You commit to a certain amount of hourly spend, say, $10/hour, and AWS automatically applies the discount to eligible usage. The best part? It works across different instance families, sizes, and even AWS Regions. This makes them perfect for workloads that are consistent but might evolve over time.
On the other hand, AWS Reserved Instances (RIs) are more rigid. They offer great discounts but lock you into a specific instance type in a specific region. This makes them a perfect fit only for your most stable, predictable workloads where you’re positive nothing is going to change for the next one to three years.
Choosing the Right Commitment for the Job
So, how do you decide? It all comes down to workload stability versus your need for flexibility. I've found that a blended approach works best for most companies. You get the biggest savings on your rock-solid core infrastructure while keeping things agile for everything else.
Here’s a quick cheat sheet for different scenarios:
- Compute Savings Plans: This is your go-to for flexibility. It covers EC2, Fargate, and Lambda usage across any region or instance family. Use it for your baseline compute spend that's always on but might shift between services.
- Standard RIs: Go for these when you want maximum savings on a workload that is absolutely not changing. Think of a production database that's been running on the same
db.r5.2xlargeinstance for ages and will continue to do so. That’s a prime candidate. - Convertible RIs: These are your middle ground. The discount is a little less than Standard RIs, but you gain the ability to change the instance family or OS. They're great for workloads that are stable but might need an upgrade or modification down the road.
I always tell my clients to dive into AWS Cost Explorer to find their "always-on" spending baseline. That number is your safe starting point for commitment coverage. It's much better to start conservatively and then increase your coverage as you get more confident in your forecasts.
Advanced Strategies and Avoiding Pitfalls
The single biggest mistake I see people make is overcommitting. Buying too many RIs or a Savings Plan that's too big locks you into paying for capacity you don't need, completely negating any potential savings. Always, always base your purchases on your absolute bare-minimum, predictable usage.
As you get more comfortable, you can start managing your commitment portfolio more actively. For instance, if your needs suddenly change, you can sell unused Standard RIs on the RI Marketplace to recoup some of the cost.
Another great tactic is to layer your commitments. Lock in a portion of your baseline with three-year terms for the deepest discounts, then layer one-year commitments on top. This gives you more frequent chances to adjust to new instance types or evolving business needs. It’s the perfect balance of maximizing savings while maintaining strategic agility.
Building a Culture of Cost Accountability
Let's be honest, technology and tools only get you so far with cost optimization aws. The real, lasting savings happen when you build a culture of financial responsibility. You know you've succeeded when every engineer, team lead, and project manager instinctively thinks about the financial impact of their decisions.
This is the entire point of FinOps. It’s a framework designed to bring financial accountability to the cloud’s flexible spending model, creating a common language between your engineering and finance teams. Cost management stops being a reactive chore handled by a central team and becomes a proactive responsibility shared by everyone.
Fostering Shared Ownership Through Visibility
The first step is to give your teams the data. When engineers can see the direct cost of the resources they spin up, they start making smarter choices all on their own. This isn't about blaming anyone for spending money; it's about giving them the context to make intelligent trade-offs between performance, speed, and cost.
Start by creating team-specific dashboards using tools like AWS Cost Explorer, fueled by your tagging data. These dashboards need to clearly show spending trends tied directly to their projects or applications. This makes the cost tangible and immediately relevant.
Effective cost optimization is a team sport. When cost data is transparent and accessible, engineers become active participants in financial success, not just consumers of infrastructure. They start asking the right questions about resource efficiency and architecture.
This approach creates a powerful feedback loop. As teams see their cost-saving efforts show up in the numbers, it reinforces good behavior and builds momentum across the entire organization. For a deeper dive into this collaborative framework, you can explore the core principles of what FinOps is and why it matters in our detailed guide.
Implementing Guardrails and Governance
While visibility encourages good behavior, you still need policies to prevent costly mistakes. AWS gives you tools that act as financial guardrails, helping you enforce spending limits without stifling innovation.
- AWS Budgets: This should be your go-to for proactive cost control. Set up custom budgets for specific accounts, teams, or projects. You can configure alerts to ping stakeholders via email or Slack when spending gets close to or exceeds your thresholds.
- Service Control Policies (SCPs): For tighter control, use SCPs within AWS Organizations. These policies can block access to certain high-cost services or limit which instance types can be launched, making sure teams operate within established financial boundaries.
These guardrails don't have to feel restrictive. The goal is to prevent accidental overspending, like a developer unintentionally launching a whole fleet of expensive GPU instances in a test environment.
Running Effective Cost Review Meetings
To keep cost optimization from falling off the radar, you need a regular review cadence. A monthly cost review meeting with key stakeholders from engineering, finance, and leadership is crucial for staying aligned and driving action.
In these meetings, focus on the why behind the numbers, not just the raw figures. Celebrate the wins where teams have successfully cut waste. When you see a spending anomaly, dig in to understand its root cause. These sessions are perfect for reviewing key performance indicators (KPIs) like your Effective Savings Rate (ESR) or your cost per customer.
This consistent review process turns cost optimization into an ongoing conversation, not a one-off project. It reinforces the idea that managing cloud spend is a shared responsibility that’s vital to the company's bottom line.
A Few Common Questions on AWS Cost Optimization
When you're diving into the world of AWS cost optimization, a few questions always seem to pop up. Getting straight answers is the first step toward building a savings strategy that actually works and keeps delivering results.
How Often Should I Really Be Looking at My AWS Costs?
For most teams, setting up a formal cost review meeting once a month is a great place to start. That rhythm is frequent enough to spot spending anomalies before they spiral into major headaches.
That said, you can't just wait for the monthly meeting. Your critical cost dashboards and budget alerts? Those need a look-over weekly, if not daily. You want to be able to react instantly to any unexpected spikes.
The real goal is to make optimization a constant habit, not a monthly chore. Automated tools can check for idle resources around the clock, turning cost management into a daily part of how you operate.
What's the Easiest, Fastest Way to Start Saving on AWS?
The quickest win, hands down, is shutting down idle resources. This is especially true in your non-production environments.
Think about it: just by putting a simple schedule in place to turn off development and testing servers outside of business hours, you can slash their specific costs by over 60%. The best part? This move requires zero architectural changes and you'll see the financial impact almost immediately.
Are Savings Plans Always a Better Deal Than Reserved Instances?
Not always. The right choice really hinges on how stable your workload is.
Savings Plans offer fantastic flexibility. They apply discounts across different instance families and even regions, which makes them perfect for workloads that are dynamic or still evolving.
On the other hand, Standard Reserved Instances can sometimes offer a slightly bigger discount if you have a workload that's incredibly stable and predictable. This is for when you know you can commit to a specific instance type in a single region for the long haul. Honestly, a blended strategy that uses both is often the most effective approach.
Ready to stop paying for idle cloud resources? CLOUD TOGGLE makes it easy to automate server schedules and cut your AWS bill. Start your 30-day free trial and see how much you can save.