A cluster auto scaler is a Kubernetes tool that automatically adjusts the number of nodes (servers) in your cluster. It acts like a savvy manager, adding more servers during traffic spikes to prevent slowdowns and removing them during quiet periods to cut costs. This dynamic adjustment ensures your applications have the resources they need without overspending on idle infrastructure.
What Is a Cluster Autoscaler and Why Is It Essential?
Imagine your Kubernetes cluster is a busy restaurant. The Cluster Autoscaler is the manager who knows exactly when to call in more staff for the dinner rush and when to send them home during the slow afternoon lull. Its core job is to automatically add or remove servers, known as nodes, to perfectly match your application's real-time demand.

Without it, you’re stuck choosing between two expensive problems. You either pay for empty tables by over-provisioning resources just in case, or you leave customers waiting by under-provisioning, which tanks your application performance. The Cluster Autoscaler is the key to escaping this no-win scenario.
The Foundation of Efficient Infrastructure
This tool is a cornerstone for any team serious about running efficient, cost-effective infrastructure in the cloud. It constantly watches for pods that can't be scheduled because there’s no room for them. When it spots these "pending" pods, it automatically provisions a new node from your cloud provider, giving the workload a place to run.
On the flip side, when it finds nodes that are underutilized for a set period, it safely drains them of any remaining pods and terminates the instance.
This automated balancing act delivers some huge benefits:
- Cost Optimization: You only pay for the compute resources you are actively using, which eliminates the financial drain from idle servers.
- Improved Reliability: Applications always have the resources they need to handle traffic surges, preventing performance slowdowns or outright outages.
- Operational Efficiency: It removes the manual, tedious work of monitoring and scaling infrastructure, freeing up your engineering team to focus on building great products.
The adoption of tools like the Kubernetes Cluster Autoscaler has exploded as organizations scramble to get their cloud spending under control. This technology can unlock 30-50% in infrastructure cost savings through right-sizing, a game-changer for engineering leaders and managed service providers.
As cloud bills keep climbing, dynamic node scaling has become a standard practice, especially in environments like AWS EKS and Azure AKS where it directly shrinks the monthly bill. You can learn more about these infrastructure cost findings and how they impact cloud management.
How the Cluster Autoscaler Actually Works
At its heart, the Cluster Autoscaler runs on a simple but powerful loop: observe, then act. It’s constantly scanning your Kubernetes cluster for two specific triggers, one to add more infrastructure, and one to take it away. This lets your cluster breathe, expanding and contracting right alongside your application's real-time needs.
Think of the autoscaler as the ultimate logistics coordinator for your cluster. Its main job is to make sure every package (a pod) has a delivery truck (a node) ready to go.
The Scale-Up Trigger: Pending Pods
A scale-up event kicks off the moment a pod gets stuck in the "Pending" state. This is what happens when the Kubernetes scheduler just can't find a home for it because there isn't a single node with enough free CPU, memory, or other resources to run the pod. It’s like a package sitting in a warehouse with no available trucks to deliver it.
When the Cluster Autoscaler spots this, it springs into action. It talks directly to your cloud provider’s API, think AWS Auto Scaling Groups or Azure Virtual Machine Scale Sets, and requests a brand new node. As soon as that new node joins the cluster, the scheduler places the pending pod on it, and your application keeps humming along without a hitch.
The Cluster Autoscaler is built for responsiveness without being too twitchy. It typically spots the need for a new node in about 30 seconds, but it will patiently wait a full 10 minutes (by default) before deciding an underutilized node needs to be removed.
This quick reaction time is absolutely essential for keeping your applications online during those unexpected traffic surges.
The Scale-Down Trigger: Underutilized Nodes
Just as important as adding capacity is knowing when to remove it to keep your cloud bill in check. The scale-down trigger fires when a node is consistently underutilized for a set period, which defaults to ten minutes. The autoscaler first checks if all the pods on this loafing node can be safely moved to other, existing nodes that have plenty of spare capacity.
If the pods can be rescheduled without disrupting anything important, the autoscaler carefully "drains" the node, moving its pods elsewhere. Once the node is empty, it makes another call to the cloud provider, this time telling it to terminate the instance and, most importantly, stop billing you for it. This constant clean-up cycle is what keeps you from paying for idle resources long after a traffic spike is over. It’s a core part of infrastructure automation and a great example of the principles behind horizontal vs. vertical scaling. To learn more, check out our guide on horizontal vs vertical scaling.
To give you a better picture, here’s a quick summary of the autoscaler's main decision points.
Cluster Autoscaler Triggers and Actions
| Event Type | Triggering Condition | Resulting Action | Typical Timing |
|---|---|---|---|
| Scale Up | Pods are stuck in a Pending state due to insufficient resources. |
Requests a new node from the cloud provider. | ~30 seconds to detect. |
| Scale Down | A node's resource utilization is below a set threshold. | Drains the node and terminates the instance. | After 10 minutes of low use. |
| No Action | Cluster resources are balanced with workload demands. | Continues to monitor the cluster's state. | Continuous loop. |
These simple rules are what make the Cluster Autoscaler such an effective tool for cost-conscious engineering teams.
Since its introduction with Kubernetes 1.8 back in late 2017, this tool has become a cornerstone of dynamic infrastructure management on all major cloud platforms. You can dig deeper into its origins and mechanics over at the CNCF blog on Kubernetes autoscaling.
Understanding the Kubernetes Autoscaling Trio
The Cluster Autoscaler is a powerful piece of the puzzle, but it rarely works alone. In any well-designed Kubernetes setup, it’s part of a team, working closely with the Horizontal Pod Autoscaler (HPA) and the Vertical Pod Autoscaler (VPA) to build a truly elastic system.
It helps to think of your cluster as a busy logistics company. Each autoscaler has a very specific and complementary job to do.
- Horizontal Pod Autoscaler (HPA): This is your dispatcher, controlling the number of delivery drivers (pods). When customer orders flood in, the HPA spins up more drivers to handle the demand.
- Vertical Pod Autoscaler (VPA): This is your fleet manager. If a driver’s truck is too small for all the packages, the VPA gives them a bigger one with more CPU and memory.
- Cluster Autoscaler: This is your real estate manager. When there’s no more room for new trucks in the existing distribution centers (nodes), it builds a brand new one.
The actions of one autoscaler often kick off a chain reaction. For example, when the HPA decides to scale out and add more pods to handle a traffic spike, those new pods need somewhere to run. If the existing nodes are already packed, the Cluster Autoscaler sees these pending pods and quickly provisions a new node to give them a home.
The Symphony of Scaling
This interconnected relationship is what gives Kubernetes its incredible elasticity. The HPA reacts to immediate application-level metrics like CPU usage, while the Cluster Autoscaler responds to the resulting infrastructure pressure. Getting a solid handle on this trio is a must for anyone serious about mastering autoscaling in Kubernetes.
Recent data shows this isn't just a niche strategy; over 64% of Kubernetes shops now use the HPA alongside cluster-level tools. But there's a catch: a massive 80% of these setups only look at basic CPU or memory metrics. For workloads with unpredictable traffic, that’s a problem because a staggering 46% of unscaled applications see multiple CPU spikes every single day. You can dig into more of these container trends in the full Datadog report.
The diagram below shows the core decision-making loop the Cluster Autoscaler runs through to add or remove nodes.
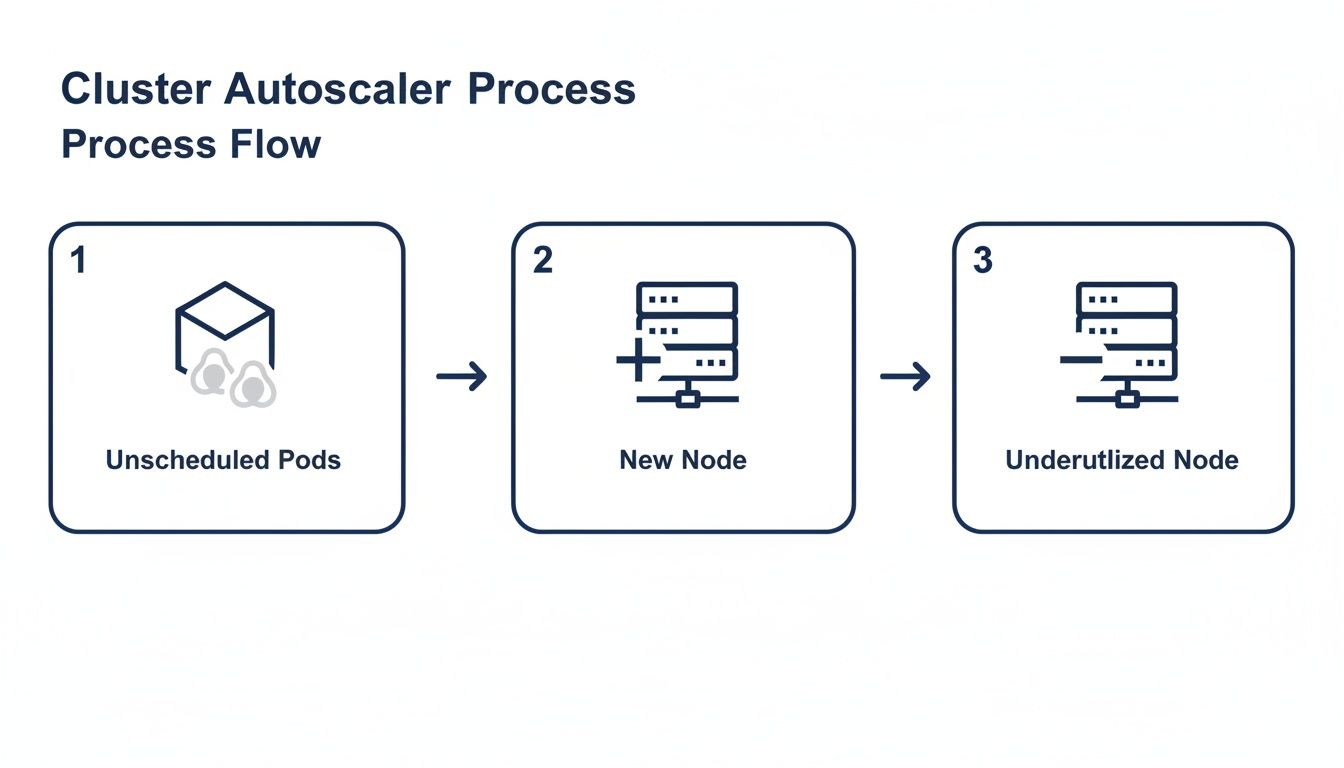
This visual breaks down the simple but highly effective cycle: it detects pods that can't be scheduled, which triggers a scale-up, and it finds underutilized nodes, which triggers a scale-down. The result is a cluster that’s always just the right size.
Understanding how these three tools interact is the key to building a truly efficient system. When they work together correctly, you get a cluster that can gracefully handle unpredictable demand while keeping your cloud costs firmly under control.
Configuring Cluster Autoscaler on EKS, AKS, and GKE
While the Cluster Autoscaler’s core job stays the same everywhere, how you actually set it up depends entirely on your cloud provider. Each platform has its own way of integrating the tool, so your first step is always to understand the lay of the land for your specific environment.
This isn't a line-by-line tutorial, but more of a practical map to help you navigate the unique landscapes of AWS, Azure, and Google Cloud.
Setting Up on Amazon EKS
When you're on Amazon Elastic Kubernetes Service (EKS), you have the most hands-on control, which means a bit more manual setup. Getting it right comes down to two critical pieces: IAM permissions and Auto Scaling Group (ASG) tags.
The Cluster Autoscaler needs an IAM role with very specific permissions to talk to other AWS services. This is what gives it the green light to actually modify your ASGs and add or remove nodes.
Next, you have to tag your ASGs correctly. Think of these tags as signposts that tell the autoscaler, "Hey, these are the node groups you're allowed to touch." Without them, the autoscaler is blind and won't know which groups to scale, making it completely useless. Honestly, getting the permissions and tags right is 90% of the battle on EKS.
The core principle on EKS is explicit permission. The Cluster Autoscaler can only manage what you explicitly allow it to through IAM policies and specific resource tags. This granular control is powerful but requires careful configuration.
Enabling on Azure AKS
Microsoft takes a much more integrated approach with its Azure Kubernetes Service (AKS). Here, the Cluster Autoscaler isn't something you install from scratch, it's a native, built-in feature you just need to enable. This makes the initial setup way simpler.
You can flip it on with a single Azure CLI command when you create a new node pool or by updating an existing one. This command-line approach handles all the underlying permissions and tricky configuration details for you, which is a big departure from the manual work required on other platforms.
Activating on Google GKE
Google Kubernetes Engine (GKE) offers the most "hands-off" experience of the three. Just like with AKS, the Cluster Autoscaler is a first-class, built-in part of the platform. You don't deploy it yourself; you just turn it on.
Enabling it is as simple as adding a configuration flag when you create or update your cluster or its node pools. GKE takes care of all the backend integration, permissions, and ongoing maintenance. This managed approach lets you stop worrying about the tool itself and focus on what really matters: defining the scaling policies that fit your workloads.
Troubleshooting Common Autoscaler Problems
So you’ve set up your Cluster Autoscaler perfectly, but it’s acting… weird. When your cluster doesn’t scale up or down the way you expect, it’s rarely a bug. More often than not, it’s a protective feature or a simple misconfiguration holding things back. The key to a quick fix is knowing where to look first.
Most of these headaches fall into two camps: your cluster refuses to scale up when pods are stuck in a pending state, or it won't scale down even when you have a bunch of underutilized nodes. Either way, these issues can quietly wreck your performance goals and your cloud bill if you let them linger.
Why Nodes Fail to Scale Up
The number one reason for a scale-up failure is that the Cluster Autoscaler thinks it can't add a new node that would actually help. Behind the scenes, it runs a simulation, checking if any of the available node types in your cloud provider could accommodate the pending pods. If it runs through all the options and none of them fit the pod's requirements, it simply won't trigger a scale-up.
When this happens, here's my go-to troubleshooting workflow:
- Check the Logs: Your first stop should always be the Cluster Autoscaler deployment logs. They're your single source of truth. Hunt for messages that give you a clue, like "Predicate failed" or "node group has max size."
- Describe the Pod: Run
kubectl describe pod <pending_pod_name>. The output almost always tells you the real story. You'll often find the pod can't be scheduled because of a taint it doesn't tolerate or a node affinity rule that no potential new node can satisfy. - Verify Cloud Permissions: This one is a classic. Make sure the autoscaler's service account or IAM role actually has permission to spin up new instances in your cloud account. It's a common and frustratingly silent cause of failure.
Why Nodes Fail to Scale Down
On the flip side, when a node refuses to scale down, it's almost always a safety feature kicking in. The Cluster Autoscaler is designed to be cautious; it will not remove a node if it thinks doing so would disrupt a workload. This is a critical protection, but sometimes it can be too cautious if things aren't configured just right.
The usual suspects preventing a scale-down include:
- System Pods: Nodes running critical pods from the
kube-systemnamespace often can't be drained if they don't have a proper Pod Disruption Budget (PDB). - Restrictive PDBs: A PDB can be too strict. For instance, setting
minAvailable: 1for an application with only one replica tells the autoscaler it can never move that pod. - Local Storage: If a pod is using a
hostPathoremptyDirvolume, it has data tied to that specific node. The autoscaler won't touch it, leaving the node running to protect that data.
When a node refuses to scale down, the Cluster Autoscaler is typically making a safe choice. Your job is to investigate why it believes the node is essential, which often points to a pod that cannot be safely evicted.
Once again, the autoscaler logs are your best friend here. Look for messages like "scale-down simulation failed" or "pod has local storage." These logs hand you the clues you need to tweak your PDBs or pod configurations, paving the way for more effective and cost-efficient scaling.
Maximizing Cost Savings with Smart Scheduling
The Cluster Autoscaler is a champ at handling the unpredictable spikes and dips of live traffic. But it's fundamentally reactive. What about the quiet times you can predict? Think about your development, staging, or testing environments sitting completely idle every night and all weekend. This is where a whole new layer of cost savings is waiting to be unlocked, savings the autoscaler simply can't see on its own.

While the autoscaler brilliantly handles the "how many" nodes you need, smart scheduling strategies tackle the "when." This combination creates a powerful one-two punch for cloud cost optimization, blending real-time reactions with proactive planning.
Fine-Tuning with Affinity and Anti-Affinity
Even before we get to shutting things down, you can make your autoscaler a lot smarter by giving it a few hints. Using built-in Kubernetes features like node affinity and anti-affinity, you can guide where your pods land.
- Node Affinity: This is like telling the scheduler, "Hey, try to put these pods on nodes with GPUs." It helps group similar workloads together.
- Anti-Affinity: This is the opposite, essentially saying, "Whatever you do, don't put these two pods on the same machine." It’s essential for high-availability setups.
By setting these rules, you can pack your pods more efficiently onto fewer nodes. This encourages the Cluster Autoscaler to get much more aggressive about scaling down underused nodes, trimming waste without you lifting a finger.
Scheduling Downtime for Non-Production Environments
The biggest and easiest savings, however, come from turning off resources that aren't being used at all. Non-production environments are the perfect target. Most of them sit completely idle for more than 120 hours every single week during nights and weekends.
A reactive Cluster Autoscaler can't anticipate this predictable idleness. Leaving these environments running 24/7 means you are paying for resources that provide zero value for over half the week.
This is where a dedicated scheduling tool becomes a game-changer. Platforms like CLOUD TOGGLE are designed to work alongside the Cluster Autoscaler by letting you set simple on/off schedules. You can automatically power down your entire dev cluster at 7 PM on Friday and have it ready to go again at 7 AM on Monday. If you're looking for more ways to optimize your cloud spend, our article on EC2 Spot Instances is packed with other great ideas.
This proactive approach makes sure you only pay for non-production infrastructure when your team is actually using it. The result? Slashed waste and a dramatically lower cloud bill.
Frequently Asked Questions
Got a few lingering questions? You're not alone. Here are quick, practical answers to some of the most common things people ask about the Kubernetes Cluster Autoscaler.
What Is the Difference Between Cluster Autoscaler and Karpenter
This is a great question, as it gets to the heart of how node scaling has evolved. The biggest difference is how they approach adding new nodes to your cluster.
The Cluster Autoscaler is the classic, battle-tested workhorse. It operates on predefined node groups that you set up ahead of time. When it needs to scale up, it simply adds another instance from one of those pre-configured pools. It’s reliable and widely understood.
Karpenter, on the other hand, is a more modern take on the problem. Instead of relying on static node groups, it looks at the specific requirements of a pending pod like CPU, memory, and architecture, and provisions a perfectly-sized, cost-effective node on the fly. This flexibility often leads to better resource utilization and lower costs, which is why Karpenter is getting so much attention, especially in AWS.
Can Cluster Autoscaler Use Spot or Preemptible Instances
Absolutely, and you definitely should. Using Spot or Preemptible instances is one of the most powerful ways to slash your Kubernetes costs, and the cluster auto scaler handles it beautifully.
The trick is to configure the autoscaler to manage multiple node groups with different pricing models. A common, and very effective, strategy is to run your critical, stateful workloads on a primary node group of on-demand instances. Then, you create a secondary group using much cheaper Spot or Preemptible instances for your fault-tolerant applications. You can then tell the autoscaler to prioritize the cheaper group, which can dramatically lower your cloud bill without compromising the stability of your core services.
What Are the Most Important Metrics to Monitor
To make sure your cluster auto scaler is actually doing its job, you need to keep an eye on a few key metrics. Watching these will tell you if it's scaling up correctly when load increases and, just as important, scaling back down to save you money when things quiet down.
I’d recommend focusing on these four things:
- Unschedulable Pods: This is the big one. It's the primary signal that tells the autoscaler it's time to add a new node.
- Node Utilization: Are your nodes actually busy? Keep an eye on both CPU and memory to make sure you're not paying for idle capacity.
- Total Node Count: A simple trend line of your node count over time is a great way to visualize your cluster's scaling patterns.
- Autoscaler Event Logs: Don't forget to check the logs from the autoscaler itself. They are a goldmine for troubleshooting errors and understanding why it made a certain scaling decision.
Managing infrastructure costs is a continuous effort that goes beyond reactive scaling. For predictable downtime in non-production environments, CLOUD TOGGLE provides a simple, powerful way to schedule shutdowns and eliminate waste. Learn how you can automate savings at https://cloudtoggle.com.