The Azure Pricing Calculator is your best friend for estimating costs before you spend a single dollar. Think of it as a free tool for modeling your expenses and getting a handle on your cloud budget before you deploy anything. It's the essential first step to understanding the financial side of running workloads in Azure.
Your First Azure VM Cost Estimate: Where to Start
Jumping into the Azure Pricing Calculator for the first time can feel like a lot. You’re hit with a dashboard full of options, and every single choice nudges the final cost up or down.
To cut through the noise, let's focus on the three foundational decisions that have the biggest impact on your estimate:
- Region
- Operating System
- VM Family
Get these three right, and you’re on your way to a realistic and cost-effective budget. These initial selections are the absolute core of your cost structure.
This little flowchart breaks down that simple, three-part starting process.
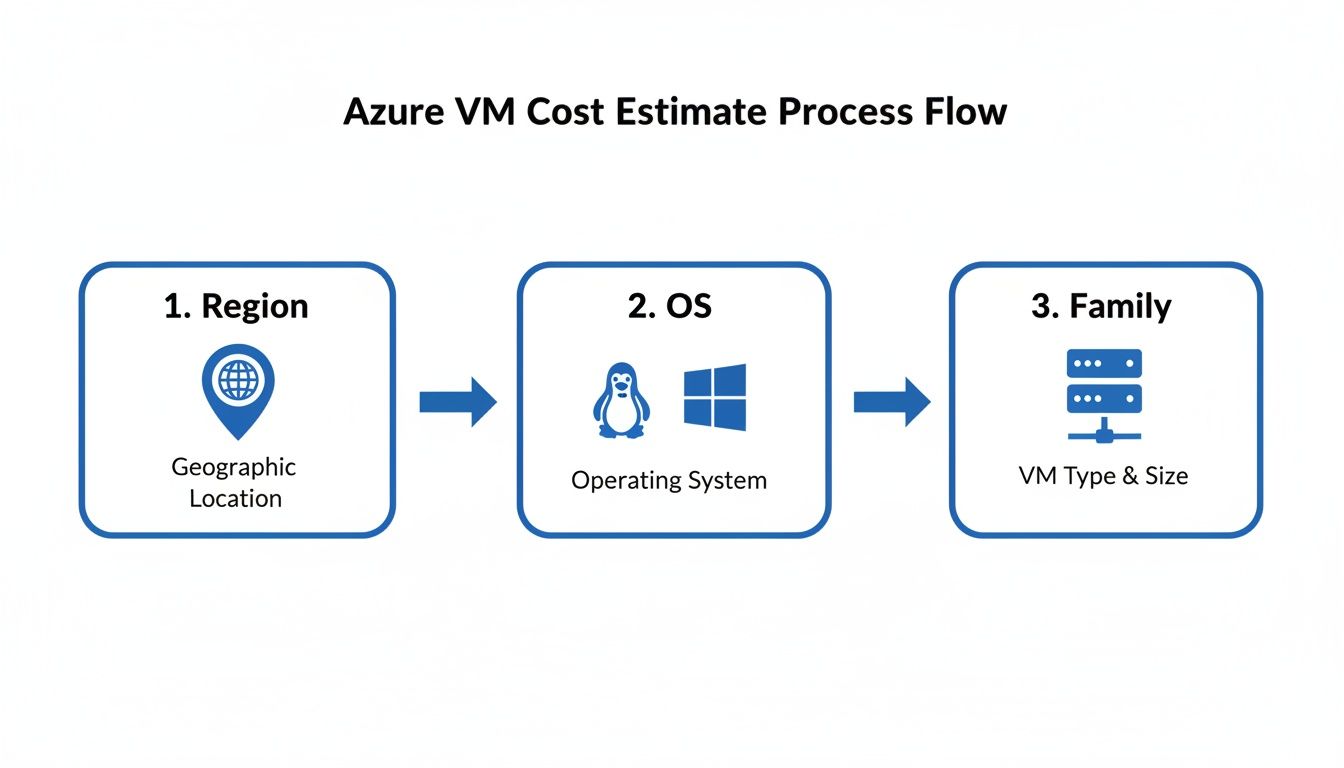
As you can see, the journey starts with geography, moves to software, and finishes with hardware. Each choice builds on the last one.
The Impact of Region and Operating System
Your first move, picking a region, is about more than just geography. The price for the exact same virtual machine can swing pretty wildly between regions like East US and West Europe. This all comes down to local operational costs like electricity, land, and taxes.
My advice? As a general rule, pick a region closest to your users to keep latency low, but always cross-reference its pricing against a few other viable options.
Next up is your operating system: Windows or Linux. This choice has a direct and immediate effect on your costs. Windows Server instances have licensing fees baked right into the hourly price, making them more expensive than their Linux counterparts, which usually lean on open-source licensing. If your application is happy running on Linux, it's almost always the cheaper way to go.
Key Takeaway: Always spend a few minutes comparing costs across a few different regions before you lock anything in. That quick check can uncover some serious savings, especially if you're planning a large deployment.
Choosing the Right VM Family
Finally, you’ll need to select a virtual machine "family." This is all about matching the hardware to what your workload actually needs. Azure groups its VMs into categories to make this a bit easier.
- General Purpose: These VMs, like the Dv5 series, give you a balanced mix of CPU and memory. They’re the workhorses for a huge range of tasks, from web servers and small databases to dev/test environments.
- Compute Optimized: Families like the Fsv2 series are all about processing power, offering a high CPU-to-memory ratio. You'd use these for heavy-lifting tasks like media transcoding, scientific modeling, or big batch jobs.
- Memory Optimized: On the flip side, the Ev5 series offers a high memory-to-CPU ratio. These are perfect for large databases, in-memory analytics, or any application that needs to cache a ton of data.
Getting the family right is crucial. If you pick a beefy Compute Optimized VM for a simple web server, you're just burning cash. But if you under-provision, your application's performance will suffer. Start by figuring out your primary performance bottleneck (CPU, memory, or a bit of both) and pick the family that addresses it.
Fine-Tuning Your Virtual Machine Instance Details
Once you've picked your region, OS, and VM family, it’s time for the real work: dialing in the specifics of your virtual machine. This is where you configure the instance itself, and getting these details right is what separates a vague guess from a rock-solid cost forecast in the Azure Pricing Calculator.

The biggest decision you'll make here is the instance size, which Azure calls a SKU (Stock Keeping Unit). Within any given family, you'll see a menu of sizes that vary by vCPUs, RAM, and temporary storage.
For example, jumping from a D2s_v5 (2 vCPUs, 8 GiB RAM) to a D4s_v5 (4 vCPUs, 16 GiB RAM) literally doubles your compute power and your cost. The goal is to find the sweet spot: the smallest size that can handle your workload without creating performance headaches.
Balancing Storage Cost and Performance
It's easy to focus on the VM, but a huge chunk of your bill will come from storage. You have to add managed disks in the calculator, and the type you choose dramatically affects both price and performance. You really need to weigh the trade-offs.
Azure has several tiers of managed disks, but you'll most often be choosing from these three:
- Standard HDD: This is your budget option. It’s perfect for development, testing, or any non-critical app where I/O speed isn't a major factor.
- Standard SSD: A fantastic middle-ground. It offers a big performance bump over HDDs, making it great for web servers, lighter enterprise apps, and dev environments that need more consistency.
- Premium SSD: Built for serious production workloads. If you're running databases or any application that needs low latency and high IOPS, this is where you should be looking.
Putting a Premium SSD on a simple backup server is just burning money. On the flip side, running a production database on a Standard HDD is a recipe for unhappy users and poor performance. The calculator lets you model each scenario, showing you exactly how much you can save by matching the right disk to the right job.
Expert Tip: Don't just think about disk type; size matters too. A larger disk costs more, but for Premium SSDs, it also comes with higher IOPS and throughput. Sometimes, picking a slightly larger disk is a surprisingly cost-effective way to get a needed performance boost without upgrading your entire VM.
Accounting for Bandwidth and Data Transfer
One of the most commonly overlooked costs is bandwidth. It's a classic "gotcha" for newcomers. While data flowing into Azure data centers is free, you pay for data going out.
The Azure Pricing Calculator has a specific section for "Bandwidth" where you can estimate your monthly outbound data transfer in gigabytes.
If you're running a public website, for instance, every image, video, and download your users access adds to that outbound data cost. Forgetting to factor this in can lead to a nasty surprise on your first bill. I usually recommend starting with a conservative estimate, maybe 100 GB for a smaller site, and then adjusting it once you have real traffic data. A complete financial picture has to include every component, not just the obvious ones like compute.
Unlocking Savings with Azure Payment and Licensing Options
Once you’ve dialed in the technical specs for your VM, the next big decision is how you’re going to pay for it. Honestly, this is where some of the most significant savings are found, often without touching a single hardware setting. The Azure pricing calculator lays out several payment and licensing models, and each one is built for different kinds of workloads.
The default choice is always Pay-as-you-go, which gives you maximum flexibility. You get billed for compute capacity by the hour or even by the second, with zero long-term commitment. This is perfect for workloads with unpredictable traffic, short-term projects, or those initial development and testing phases where you're still figuring out what you actually need.
But for your steady, always-on workloads, committing to a plan is where you'll see some dramatic discounts. The calculator is great because it lets you model these commitments and see the financial impact right away.
Commitment-Based Savings
For those consistent workloads that form the backbone of your operations, Azure gives you two main ways to save money by committing upfront.
- Azure Savings Plans: Think of this as the flexible option. You commit to a fixed hourly spend for one or three years, and the discount automatically applies to compute usage across a wide range of services, including VMs. It's a fantastic choice if you know your overall usage is predictable, but the specific VM types you use might change over time.
- Azure Reserved Instances (RIs): This is where you can get the deepest discounts. With RIs, you commit to a specific VM family in a particular region for a one or three-year term. The trade-off for less flexibility is a much lower price, sometimes up to 72% off what you’d pay with pay-as-you-go. RIs are ideal for static applications where you know exactly which VM you’ll need for years to come.
Pro Tip: When you're in the calculator, always toggle between a 1-year and a 3-year RI. The savings jump is often surprisingly large with the longer term, and seeing that total cost difference in black and white can make it much easier to justify the extended commitment for core business apps.
Maximizing Your Existing Licenses
Beyond just how you pay, Azure offers some powerful ways to bring your own software licenses to the cloud. Ticking these boxes in the calculator can slash your estimated costs.
The Azure Hybrid Benefit is a game-changer for any business that already owns on-premises Windows Server or SQL Server licenses with active Software Assurance. By selecting this option, you essentially tell Azure you’ve already paid for the software, so you only need to pay for the base compute infrastructure. This can knock up to 40% or more off the cost of your Windows Server VMs. You can get the full rundown on how this works in our detailed guide on the Azure Hybrid Benefit.
Another huge money-saver is Dev/Test pricing. If you have Visual Studio subscribers on your team, this option reduces the cost of running Windows Server, SQL Server, and other Microsoft software for any non-production work. When you select this in the calculator, it strips out the software licensing costs, letting you run Windows VMs for the same price as Linux VMs. It's an absolutely essential tool for keeping development and testing budgets in check without cutting corners. This whole approach to billing became much clearer after Microsoft's billing revamp on January 11, 2016, which moved from confusing fractional meters to simple per-second meters for each VM size.
Not every application needs the full, uninterrupted power of a standard virtual machine running 24/7. Far from it.
For workloads with flexible or intermittent performance needs, the Azure Pricing Calculator reveals two powerful, cost-saving alternatives: Spot Virtual Machines and burstable B-series instances. Learning how to model these options is key to unlocking some serious savings for the right kind of application.
Mastering Spot VM Pricing
Spot Virtual Machines offer the deepest discounts you can find in Azure, running on the platform's unused compute capacity. The catch? Azure can reclaim this capacity at any time, "evicting" your VM with little notice. This makes them a terrible fit for critical production workloads but absolutely perfect for fault-tolerant tasks like batch processing, rendering farms, or extensive testing scenarios.
When you select a Spot instance in the calculator, you're not just seeing a lower price; you're playing a dynamic market. The real skill here is balancing the massive potential savings against the risk of your VM disappearing.
Spot instances can slash up to 90% off on-demand prices, but they come with eviction risks that average 5-10% in high-demand regions like East US. The calculator gives you a crucial edge by linking out to historical pricing and eviction data for your chosen VM size. This data helps you answer a few critical questions before you commit:
- How volatile has the price been for my chosen VM size?
- What is the historical eviction rate in my target region?
A low eviction rate might just give you the confidence to run less critical, but still important, workloads on Spot VMs, stretching your budget further than you thought possible.
Real-World Example: Imagine you need to run a data analysis job that takes several hours but can be restarted if interrupted. By checking the history and seeing a low eviction rate (e.g., under 5%) for a specific VM size in the Central US region, you can confidently model that cost in the calculator, projecting a tiny fraction of the pay-as-you-go price.
Calculating Costs for Burstable B-Series Instances
Another fantastic tool for shaving down your Azure bill is the B-series VM family. These instances are built for workloads that usually just coast along with low CPU usage but occasionally need to "burst" to handle a sudden spike in traffic or a heavy processing demand. Think low-traffic web servers, small databases, or development environments.
B-series VMs work on a credit system. They build up CPU credits when usage is below their baseline performance and spend those credits when they need to burst above it. The Azure pricing calculator makes this easy, showing a low, predictable monthly cost based on the instance humming along at its baseline.
This model is a core part of many effective cloud cost optimization strategies, as it stops you from overprovisioning (and overpaying) for workloads that are idle most of the time. For instance, a small company's internal HR portal might be inactive for 22 hours a day but see heavy use during morning log-ins. A B-series VM is the perfect fit, keeping costs minimal during the quiet times while ensuring performance is there when it’s needed.
Azure VM Pricing Model Comparison
Choosing the right pricing model can feel complex, but it boils down to understanding your workload's needs and your tolerance for commitment and risk. This table breaks down the three main options to help you decide.
| Pricing Model | Best For | Potential Savings | Commitment | Key Consideration |
|---|---|---|---|---|
| Pay-as-you-go | Unpredictable or short-term workloads, development, and testing. | None | None | Highest cost but maximum flexibility. Pay only for what you use. |
| Reserved Instances | Stable, predictable production workloads with consistent usage. | Up to 72% | 1 or 3 years | Requires long-term planning but offers significant, guaranteed savings. |
| Spot VMs | Fault-tolerant, non-critical, or interruptible workloads. | Up to 90% | None | Lowest cost, but your VM can be evicted with little notice. |
Ultimately, the best choice depends entirely on your specific use case. For steady, mission-critical applications, Reserved Instances are a clear winner. For spiky or unpredictable needs, Pay-as-you-go provides essential flexibility. And for anything that can handle an interruption, Spot VMs deliver unbeatable savings.
How to Save, Export, and Share Your Cost Estimates
Building an accurate estimate is one thing, but it's not much use if you can't share it with your team and stakeholders. Once you've modeled the perfect virtual machine setup in the Azure pricing calculator, the next step is getting that information into the right hands. Thankfully, the tool has some simple but powerful features built just for this.
You can save your calculations right inside the calculator's interface. I find this incredibly handy for comparing different scenarios side-by-side. For instance, you could save one estimate using a Pay-as-you-go model and another with a three-year Reserved Instance to show your finance team the exact savings from a long-term commitment.
Exporting and Sharing for Collaboration
When it's time for a more formal presentation or you need to dig deeper into the numbers, you'll want to export your estimate. The calculator lets you download the entire configuration as a Microsoft Excel spreadsheet. This is perfect for creating custom reports, embedding cost data into project proposals, or running your own analysis.
This export feature is a critical piece of the puzzle for building out more comprehensive cloud spending budgets and forecasts. You can also generate a unique, shareable link to your estimate. Just send this link to a colleague or manager, and they can see your exact configuration without having to rebuild it from scratch. It’s a huge time-saver that makes collaboration and getting approvals much smoother.
It's worth remembering that Azure defines a standard month as 730 hours for VM pricing. This is the figure the calculator uses to model continuous workloads and is really helpful for TCO comparisons. Migrating on-premises setups often leads to 30-50% lower costs, a point you can back up with these detailed estimates. For a deeper dive, this Datacamp guide covers more Azure pricing essentials.
By using these features, the calculator becomes more than just an estimation tool; it becomes a central hub for your financial planning and teamwork. The ability to save, export, and share ensures your hard work leads to informed decisions and helps get the buy-in you need to move forward.
Common Questions About the Azure Pricing Calculator
Even with a perfectly built estimate, a few common questions always seem to pop up when you're using the Azure Pricing Calculator. Getting these sorted out is key to making sure your forecast is rock-solid and you're not caught by surprise later.
Let's walk through some of the most frequent queries I hear.
Does The Azure Pricing Calculator Include Taxes?
This is usually the first question from the finance team, and for good reason. The short answer is no, the estimates you get from the Azure Pricing Calculator do not include taxes.
Think of the calculator's output as the direct, pre-tax cost of the services themselves. Your final bill will have additional charges like Value Added Tax (VAT) or other local taxes tacked on, depending on your company's billing country. Always treat the calculator's total as a subtotal and factor in your local tax rate separately to build a complete, accurate budget.
If you scroll to the bottom of the estimate page, you'll usually see a disclaimer confirming that the prices shown are exclusive of taxes, which is a helpful little reminder.
What Is The Difference Between The Pricing And TCO Calculators?
This is a big point of confusion, but the two tools are built for very different jobs. The easiest way to think about it is planning a brand-new build versus planning a renovation.
The Pricing Calculator is what you use for estimating costs for new projects you intend to build directly in Azure. You're picking specific services (virtual machines, storage, networking) to model a cloud-native application from scratch.
In contrast, the Total Cost of Ownership (TCO) Calculator is all about migration planning. It helps you compare the cost of running your existing on-premises workloads against what it would cost to run them in Azure. You feed it your current server, storage, and labor costs, and it spits out a report highlighting potential savings.
Key Takeaway: Use the Pricing Calculator for net-new cloud deployments. Use the TCO Calculator when you're building a business case to migrate existing on-prem infrastructure to Azure.
How Often Are The Calculator Prices Updated?
The prices inside the Azure Pricing Calculator are updated frequently to keep them in sync with the current rates for Azure services. Microsoft does a good job of keeping it aligned with real-time pricing.
However, cloud pricing is dynamic and can shift over time. An estimate you create today might not be perfectly accurate six months from now because of service price adjustments. For any long-term project, it's a best practice to revisit and refresh your saved estimates periodically, especially right before you kick off the deployment.
This is another area where commitment-based discounts really shine. When you purchase a Reserved Instance or an Azure Savings Plan, you lock in your discounted rate for the entire one or three-year term. This gives you much-needed cost predictability and protects that part of your budget from any future price hikes.
Are your cloud servers running idle overnight or on weekends? CLOUD TOGGLE helps you stop paying for resources you aren't using. Our platform makes it simple to automate shutdown schedules for your Azure and AWS virtual machines, cutting waste and lowering your monthly bill. Start your free 30-day trial and see how much you can save.